DTF transfers have surged in popularity for creating custom tees, hoodies, and other apparel. Compared with traditional screen printing, DTF printing offers a flexible, scalable solution that minimizes setup for projects and delivers vibrant results. A straightforward pathway from design to adhesive powder to heat press helps you optimize the workflow. The method yields durable, color-rich graphics that withstand washing across a variety of fabrics. For those evaluating options, this approach is often compared to heat-transfer methods in terms of durability, cost, and turnaround.
In other terms, the same concept is a film-based transfer workflow that prints artwork onto a carrier, then bonds it to textile with heat. That terminology reflects the shift from screens and pastes to digital-to-fabric graphics that can be applied across cotton, blends, and synthetic fabrics. By focusing on color fidelity, adhesion strength, and a soft hand feel, this approach supports small runs and quick design iteration. As you evaluate suppliers, look for reliable powders, films, and heat-press settings that align with your brand’s quality standards. Ultimately, the technique sits alongside heat transfer and screen printing as part of a flexible toolkit for creating market-ready apparel.
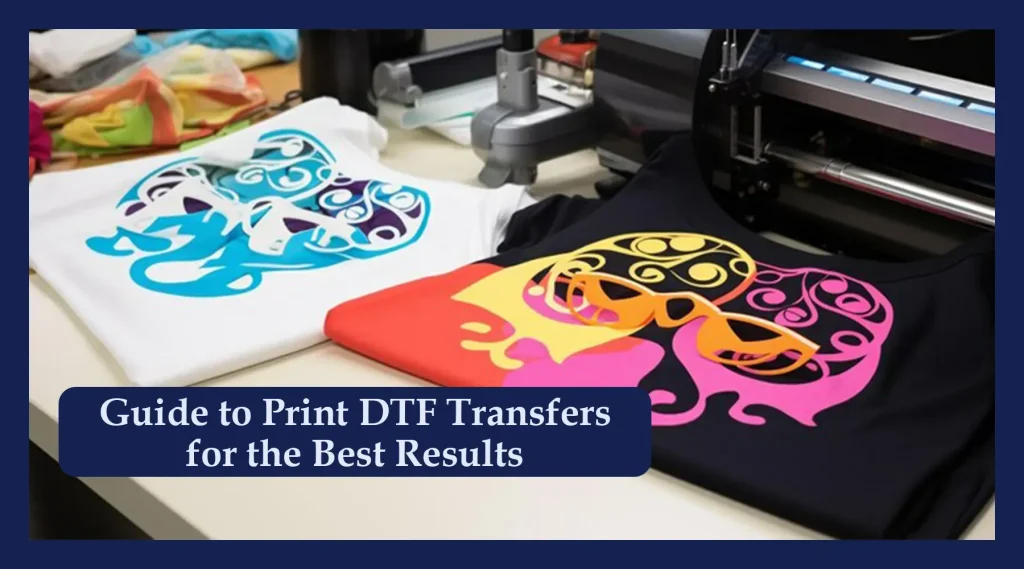
DTF Transfers: A Modern Solution for Custom T-Shirts
DTF transfers offer a flexible, scalable path to professional-looking garments for custom t-shirts, hoodies, and more. They deliver vibrant color, a soft hand-feel, and broad fabric compatibility, making them ideal for designers who want both detail and texture without the long setup of traditional screen printing. This potential is realized through DTF printing—direct-to-film—that prints artwork onto a specialized film and uses adhesive powder to bond to fabrics, producing durable results on a wide range of materials.
Because there are no bulky screens or high minimums, DTF transfers excel for small runs and samples. The DTF transfer process supports gradients and complex artwork with high color fidelity, which helps you create showroom-worthy designs for custom t-shirts. Whether you’re building a one-off tee or a small product line, DTF transfers enable fast iteration and consistent quality across batches.
Understanding the DTF Transfer Process from Design to Finish
A successful DTF project begins with design prepared for print in a vector or high-resolution raster format. Plan color layers, white underbase for dark fabrics, and print area boundaries to guide the DTF printing stage. This setup is part of the DTF printing discipline and sets the stage for a smooth DTF transfer process.
From printing on film to powdering, curing, and heat pressing, every step matters for adhesion and wash durability. The transfer is then peeled away after cooling, revealing a crisp image bonded to the fabric. Mastery of these steps—plus decisions about hot or cold peel depending on the film and substrate—defines the finish you’ll achieve in your custom t-shirts.
DTF Printing vs Other Methods: DTF vs Heat Transfer and Screen Printing
DTF printing offers durability, color vibrancy, and fabric versatility that can surpass traditional heat transfer and screen printing in many scenarios. In particular, DTF vs heat transfer comparisons often favor DTF for longer-lasting results and better edge definition, while offering more flexibility across fabrics and colors.
For small runs or prints on mixed fabrics, DTF frequently yields superior outcomes to heat transfer, whereas screen printing remains cost-effective for large batches. The choice for your custom t-shirts depends on order size, fabric composition, and your goals for hand feel and washability. Evaluating these factors helps you pick the right method for each design.
DTF Transfer Tips: Practical Advice for Consistent Results
Calibrate your printer, manage color profiles, and run test prints to minimize color shifts and misalignment. Implementing these DTF transfer tips early in the process helps you predict how designs will behave on different fabrics and under varying heat press conditions.
Dust the powder evenly, cure correctly, and apply heat and pressure consistently during transfer. Always perform a test transfer on a scrap garment before a full production run to fine-tune temperatures, times, and pressure, ensuring reliable results across batches.
Materials, Workflow, and Quality Control for Durable DTF Transfers
Select reliable DTF film and powder, compatible inks, and a dependable heat press. Pre-wash fabrics to remove finishes that could hinder adhesion, and choose fabric types that respond well to the DTF process to maximize durability and color fidelity in your custom t-shirts.
Develop a standardized workflow and quality control checklist to catch issues like misalignment, inconsistent color density, or incomplete curing before finishing garments. Keeping thorough records of settings, fabrics, and materials creates a scalable system for producing high-quality DTF transfers on your line of custom tees.
Frequently Asked Questions
What are DTF transfers and how do they work for custom t-shirts?
DTF transfers are designs printed on specialized film using water-based inks, then coated with an adhesive powder, cured, and heat-pressed onto fabric. This DTF printing method works on cotton, polyester, blends, and more, delivering vibrant color, a soft hand-feel, and durable adhesion for custom t-shirts. The DTF transfer process is well-suited for both single designs and small batches without screens.
DTF vs heat transfer: which is better for small runs of custom t-shirts?
For small runs, DTF transfers reduce setup time and avoid screens, making them ideal for custom t-shirts. DTF printing generally offers better color reproduction, durability, and fabric versatility than traditional heat transfer, especially on dark fabrics with proper white underbase, while keeping production efficient for limited runs.
What are essential DTF transfer tips to improve results?
DTF transfer tips include calibrating your printer for accurate color, planning a white underbase for dark fabrics, printing at high resolution, applying adhesive powder evenly, curing the powder correctly, and testing on scrap fabric before production to ensure consistent color density and adhesion.
Which fabrics are best suited for DTF transfers on custom t-shirts?
DTF transfers work well on cotton, polyester, and blends, and can handle dark fabrics with a proper white underbase. For best results, pre-wash fabrics to remove finishes, select compatible fabrics, and optimize heat and pressure settings for reliable adhesion and durability.
What is the DTF transfer process from design to finished garment?
The DTF transfer process typically includes: artwork preparation, printing on DTF film, adding and curing adhesive powder, transferring with a heat press, peeling away the film after cooling, and post-press care. This workflow supports fast, scalable production for custom t-shirts.
| Topic | Key Points |
|---|---|
| What are DTF transfers? | DTF transfers involve printing designs onto a special film using water-based inks, then coating with an adhesive powder, curing, and heat-pressing onto fabric. The result is a durable, vibrant image that adheres to cotton, polyester, blends, and other fabrics. By separating the design from the garment, DTF printing enables excellent color reproduction, a softer hand-feel, and fewer stock constraints than traditional screen printing; many designers call it a modern alternative to heat transfer and screen-printing workflows. |
| Why choose DTF transfers for custom tees? | – Color accuracy and detail: reproduces gradients, fine lines, and intricate artwork with high fidelity. – Versatility on fabrics: works on cotton, polyester, blends, and even dark fabrics with white underbase. – Lower setup for small runs: no screens or setup costs for small batches. – Durability: resists cracking and fading after multiple washes. – Design flexibility: prints multiple colors and complex graphics without common color-locking issues. |
| The DTF transfer process explained (step by step) |
|
| Key materials and equipment for DTF transfers |
|
| Artwork and design considerations for DTF transfers |
|
| Printing and powdering: practical tips |
|
| Curing and pressing: achieving consistent results |
|
| Troubleshooting common issues in DTF transfers |
|
| DTF transfers for custom tees: best practices |
|
| DTF transfers vs other methods: a quick comparison |
|
| Crafting a successful DTF transfer workflow for your brand |
|
Summary
DTF transfers offer a compelling path to vibrant, durable custom tees with flexibility and efficiency. By understanding the DTF transfer process, selecting the right materials, and following best practices for printing, curing, and pressing, you can achieve studio-quality results for your own line or projects. From initial artwork to final finish, embracing the power of DTF transfers—along with solid techniques for DTF printing and transfer tips—puts you in a strong position to create high-quality, market-ready apparel that stands out in a crowded marketplace. Whether you’re comparing DTF transfers to heat transfer or exploring how it compares to screen printing, the key is practice, precision, and a clear workflow that ensures consistent, impressive results with every tee you produce.