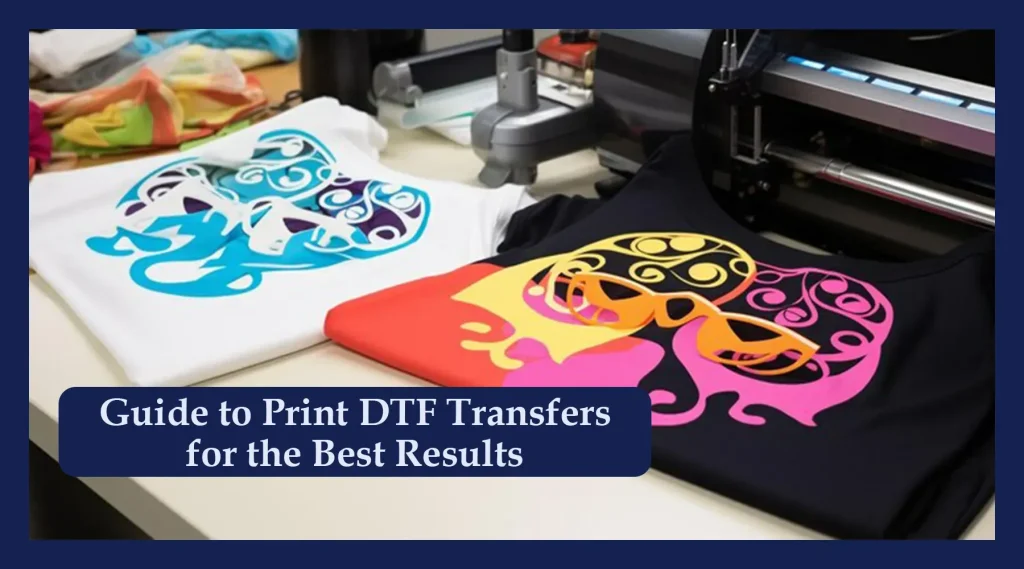
DTF transfers have opened up exciting possibilities for hobbyists and small studios alike, letting you bring vibrant, durable designs to fabric from a home setup, with a flexible workflow that fits on a kitchen table or a dedicated corner of a spare room. If you’ve ever wanted to create eye-catching apparel and accessories, the DTF workflow provides a flexible path from concept to finished piece, giving you control over color, texture, and placement for a range of fabrics and project scopes. This guide blends practical steps with design-focused tips, including DTF design tips and insights on how to apply DTF transfers at home, so you can experiment confidently even as you expand your toolkit, test different fabrics, and build a small, reliable production cadence. Learn about DTF peeling and curing to ensure color longevity and a soft finish, and see how a well-organized home workspace can support your creativity by consolidating printing, curing, and finishing into a repeatable routine that you can repeat project after project. By following a careful, repeatable process, you can turn simple t-shirts, tote bags, and fabrics into polished pieces with a lasting finish, whether you’re printing at home or in a small studio, and you’ll gain confidence with each new project as you refine your setup.
Seen from another angle, this is essentially a direct-to-film printing method, a fabric-transfer technology that starts with a printed PET film and adhesive powder and ends with a durable image bonded to textiles. Think of it as a print-on-film workflow that translates artwork into physical wearables, using heat to activate the glue and secure the ink while preserving a soft hand. This framing connects to broader topics in home textile production, including beginner-friendly home studio setups, color management for textiles, and safe, practical workflows that suit hobbyists. By using related terms such as fabric printing at home and adhesive-coated film processes, you align your content with search intent and capture a wider audience of crafters and makers.
DTF Design Tips for Home Projects
DTF design tips start long before the printer hums to life. In the planning stage, consider color accuracy, texture, and how the garment will feel when worn. Focusing on practical design decisions—like using a 300 dpi resolution, working in RGB on screen, and converting to CMYK as needed for your specific printer—helps ensure reliable results. Remember that white ink layers can behave differently on dark fabrics, so plan with a white base layer where necessary.
Simplicity often wins in home projects. Bold shapes, strong outlines, and legible typography translate better when the fabric is washed and worn. Evaluate whether a design should be simplified for durability, especially for small text or intricate details that might blur on textured fabrics. If you’re creating a set of items, design a scalable template that maintains proportion and alignment across different garment sizes—this is a core part of the DTF design tips workflow.
Test prints are your friend. Create a small fabric swatch to verify color depth, opacity, and edge sharpness before committing to a full run. Keeping a log of each test, including fabric type and underbase decisions, helps you refine your approach and consistently produce crisp results with every project.
Setting Up a DIY Home Studio for Fabric Transfers: Tools, Space, and Safety
A well-planned space makes the DTF process smoother and more repeatable. Designate a dedicated area for printing, curing, and pressing, and separate powders and adhesives from food prep surfaces. Ensure adequate ventilation for any solvent-based cleanup, and establish zones to minimize cross-contamination between materials and finished projects.
Essential tools turn a basement corner into a functional studio. A DTF printer or reliable access to a DTF service, DTF film with a white underbase, adhesive powder, and a curing device (conveyor dryer or a heat press with curing mode) are foundational. Include a heat press or ergonomic iron, a lint roller, heat-resistant gloves, silicone mat, and precise alignment aids like rulers or T-squares to improve repeatability.
Safety and organization matter as you scale up. Store powders sealed and labeled, keep moisture away from films, and create simple filing systems for designs and templates. A clean, flat workspace reduces misalignment, while keeping your setup compact helps you stay focused on quality—an essential aspect of the DIY home studio for fabric projects.
How to Apply DTF Transfers at Home: Step-by-Step Guide
Understanding how to apply DTF transfers starts with a clear workflow. Begin with design preparation and color layer separation, keeping in mind how the white base will interact with the fabric color. If you’re printing on dark fabrics, plan for a white underbase to achieve better opacity and color vibrancy.
The core steps follow: print on DTF film using optimized printer settings, apply adhesive powder evenly while the film is still slightly damp, and cure the powder to create a stable transfer. Proper curing ensures the image adheres firmly when placed on fabric, reducing the risk of edge lifting.
Next, align the film on the garment with precision, using top guides or tape to maintain position. Transfer with a heat press at the manufacturer-recommended temperature and time, cover with a teflon sheet, and press firmly. Finally, peel the film using hot or cold peel guidance from the product you’re using, and consider a post-press cure to maximize wash durability.
DTF Peeling and Curing: Techniques for Durability and Edge Quality
DTF peeling and curing decisions influence edge clarity and longevity. Hot peeling removes the film while it’s still warm, which often yields crisper edges on certain fabrics, but requires careful handling to avoid distortion. Cold peeling can reduce edge lifts on challenging textures but may demand longer cooling and more precise timing.
Maintaining temperature and pressure consistency across the transfer area is critical. Uneven heat can cause color banding or incomplete adhesion, while over-curing can degrade fabric fibers or cause cracking on some materials. A deliberate, controlled post-cure step after transfer can improve wash durability without compromising texture.
Different fabrics respond differently to peeling and curing, so document your results for each material. Cotton blends, poly blends, and specialty fabrics benefit from testing a small swatch first to determine the ideal peel approach and cure duration.
Troubleshooting and Advanced Tips for Consistent Results with DTF Transfers at Home
Common issues in home production often point to preparation or calibration gaps. Velvet or textured fabrics may resist adhesion, so pre-washing and ensuring the fabric is completely dry helps. If you see color mismatch, isolate the problem with printer calibration, color charts, and a test print on the same fabric used for the final piece.
Advanced tips focus on reliability and speed. Plan color separations to minimize tiny color transitions that can misregister, and always test on a small fabric swatch before large runs. Testing across a few garment types—like different T-shirt sizes or sleeve lengths—ensures your transfer sits correctly when worn.
Ongoing care and maintenance keep your process consistent. Track which designs perform best on which fabrics, store designs and films properly, and provide simple wash and care instructions to extend the life of your transfers. With this approach, you can master DTF transfers at home and deliver reliable results for a growing set of projects.
Frequently Asked Questions
What are DTF transfers and how can I start using them in a DIY home studio for fabric projects?
DTF transfers are printed images on a PET film that use a heat‑activated adhesive powder. After printing and curing, the film is pressed onto fabric to create a durable transfer with a soft hand. To start in a DIY home studio for fabric projects, gather a heat press, access to a DTF printer or service, DTF film and white ink (for dark fabrics), adhesive powder, a curing device, and basic safety gear, then follow a repeatable workflow from design tips to curing.
What are essential DTF design tips to ensure vibrant, durable transfers when applying at home?
DTF design tips include working at 300 dpi in RGB for on‑screen design, adding a white base layer for dark fabrics, using bold shapes and clear outlines, and testing typography on a sample. Plan color layers to match your printer’s capabilities and create templates that scale to multiple garment sizes.
How do you properly apply DTF transfers at home, including printing, curing, and pressing?
Outline a simple workflow: design and color separation, print on DTF film (white underbase if needed), apply adhesive powder and cure, align the film on fabric, press at the recommended temperature and time, then peel according to hot or cold guidelines and cure if required. Follow the manufacturer’s specs for best results.
What is the difference between hot peel and cold peel in DTF peeling and curing, and which should I use for home projects?
Hot peel removes the film while warm for crisper edges on many fabrics; cold peel is done after cooling to reduce edge lifting on textured fabrics. For home projects, start with hot peel on smooth fabrics and test cold peel on challenging fabrics to find what works best.
What should a DIY home studio for fabric projects include to achieve reliable DTF transfers at home?
A focused DIY home studio for fabric projects should include a dedicated workspace, good ventilation, a reliable heat press, access to a DTF printer or service, DTF film with adhesive powder and white ink as needed, a curing device, protective gear, and organized storage for designs and supplies. Start with essential gear and expand as you gain experience.
| Aspect | Key Points |
|---|---|
| Overview of DTF transfers |
|
| Planning and design tips (DTF design tips) |
|
| Materials & tools |
|
| Step-by-step workflow (design to curing) |
|
| Peels & curing (DTF peeling and curing tips) |
|
| Troubleshooting (DTF design tips and problem-solving) |
|
| DIY home studio workflow (organization, safety, and optimization) |
|
| Advanced tips (DTF design tips) |
|
| Finishing touches and maintenance |
|
Summary
DTF transfers empower hobbyists and small studios to create durable, vibrant fabric designs from a home workspace. By combining thoughtful design, reliable materials, and a careful peeling and curing routine, you can achieve professional-looking transfers that stand up to washing and wear. Use the practical tips and workflow outlined here to build a repeatable process, scale your projects from single pieces to small runs, and continually improve your DTF transfers as you gain experience and confidence.